Capture videos and screenshots of the remote desktop
SetMe's video recording tool allows you to easily create a documented video of your activity on the remote user's desktop. The recordings are saved as an .mp4 file in a selected path on the local computer and are useful for training, quality control, auditing, and other use cases.
The screen capture tool allows you to take screenshots of the remote user's desktop via the toolbar. The screen captures are saved as a .png file in a selected path on your computer.
In this article:
- Record your connection
- Take a screenshot of the remote screen
- Select custom location for screenshots and video files
- Enable auto recording
Record your connection
The video recording can be enabled either at the start of the remote desktop connection or when working with the remote desktop.
Connect to the remote computer and select a Start Control or Start View operation. Navigate to the remote desktop toolbar and click the video recording icon.
You can pause/resume, stop, or cancel your recording at any time using the dropdown menu:
The recording is automatically stopped as soon as you've disconnected from the remote computer.
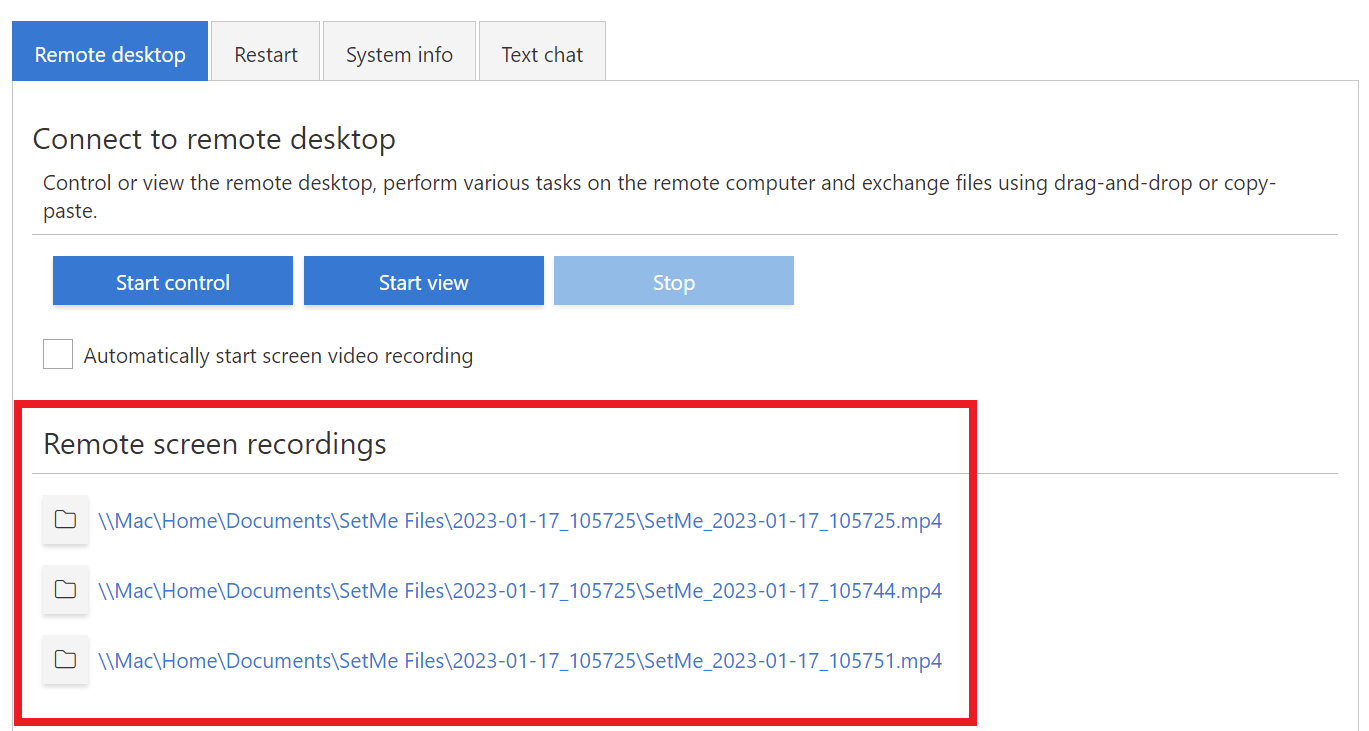
Once the video recording is ended, the recorded file and its path will be displayed within your Remote Desktop tab. You may click the link to play the video in your default media player or click on the folder icon to open the file's location.
The HEVC (H.265) codec must be installed on your computer in order to play the recorded video file.
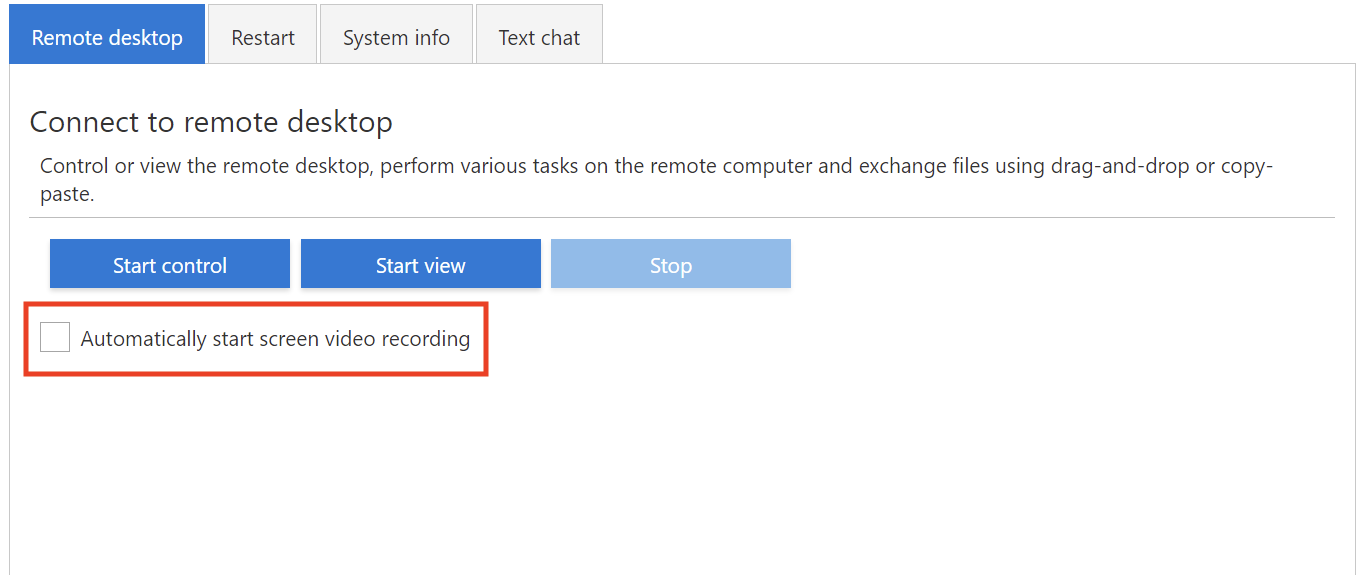
To enable video recording at the start of your connection, check the Automatically start screen video recording option and select a Start Control or Start View operation.
The video recording will start as soon as you're connected to the remote desktop.
Take a screenshot of the remote screen
To take a screenshot of the remote user's desktop, click the screen capture button on the remote desktop toolbar:
You can only capture the entire screen.
The screenshot and its path will be displayed within your Remote Desktop tab. You may click the link to view the screen capture or click the folder icon to open the file's location.
Select custom location for screenshots and video files
By default, your video recordings and screenshots are saved to the local computer's Documents folder. However, you may designate a specific folder on your computer where all SetMe video recordings and screenshots will be automatically saved. To select a custom location for the recorded video/screenshot:
Step 1:
Click the Settings icon in the top-right corner of the Expert Console.
Step 2:
Under General view settings, click the Change location button to select a preferred target location for saving the recorded video files and screenshots.
Enable auto video recording
By default, the video recording is enabled manually during the remote connection. However you may also enable auto video recording so that the recording will start at the beginning of each SetMe remote connection automatically. To enable auto video recording:
Step 1:
Click the Settings icon in the top-right corner of the Expert Console.
Step 2:
Under Default settings for remote desktop, check the Automatically start screen video recording when remote desktop is connected option.


