Set up unattended access using a custom installer
- With SetMe Professional plan, you can configure and manage an unlimited number of unattended computers.
- SetMe Solo allows you to configure and manage no more than 200 computers.
To set up unattended access on a remote computer using a custom installer:
Step 1
Configure a custom unattended access installer in the Resource library section of your web portal. When configuring the installer, you can take advantage of a variety of useful settings that can be adjusted at any point after the installation is completed.
Step 2
Windows:
Click Generate Windows EXE to download an .exe setup file for single-computer installation.
Click Generate Windows MSI to download an .msi package for mass installing SetMe's unattended access.
You can create multiple custom installers and use them based on each specific scenario, customer site, or network environment that you're working with. You can also use the same unattended installer on multiple remote computers.
macOS:
Click Generate for macOS to download your setup file.
Unattended access installers for macOS are downloaded as compressed ZIP files.
Step 3
Run your custom installer on the remote computer to install unattended access.
Depending on the remote computer's network configuration, the remote user may be prompted to enter their proxy credentials during installation.
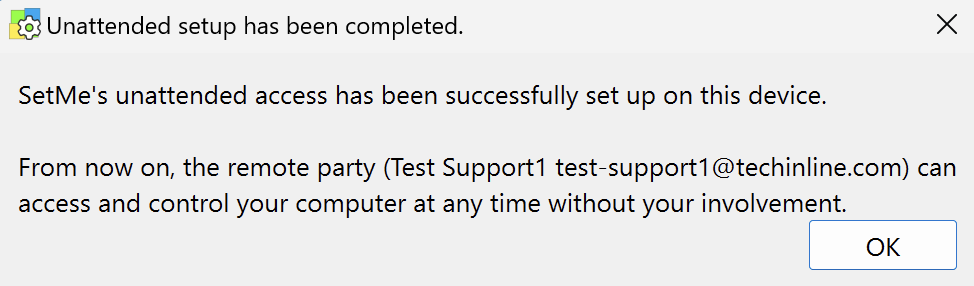
After the installation is completed, a confirmation dialog will be displayed on the remote computer:
If you've chosen to enable automatic sign-in during an unattended connection, the remote user will also be prompted to enter their OS user credentials.
The Unattended client application will appear in the remote computer's Installed Apps list and system tray.

The computer will be added to your Unattended list. You can connect to and manage this computer at any time.